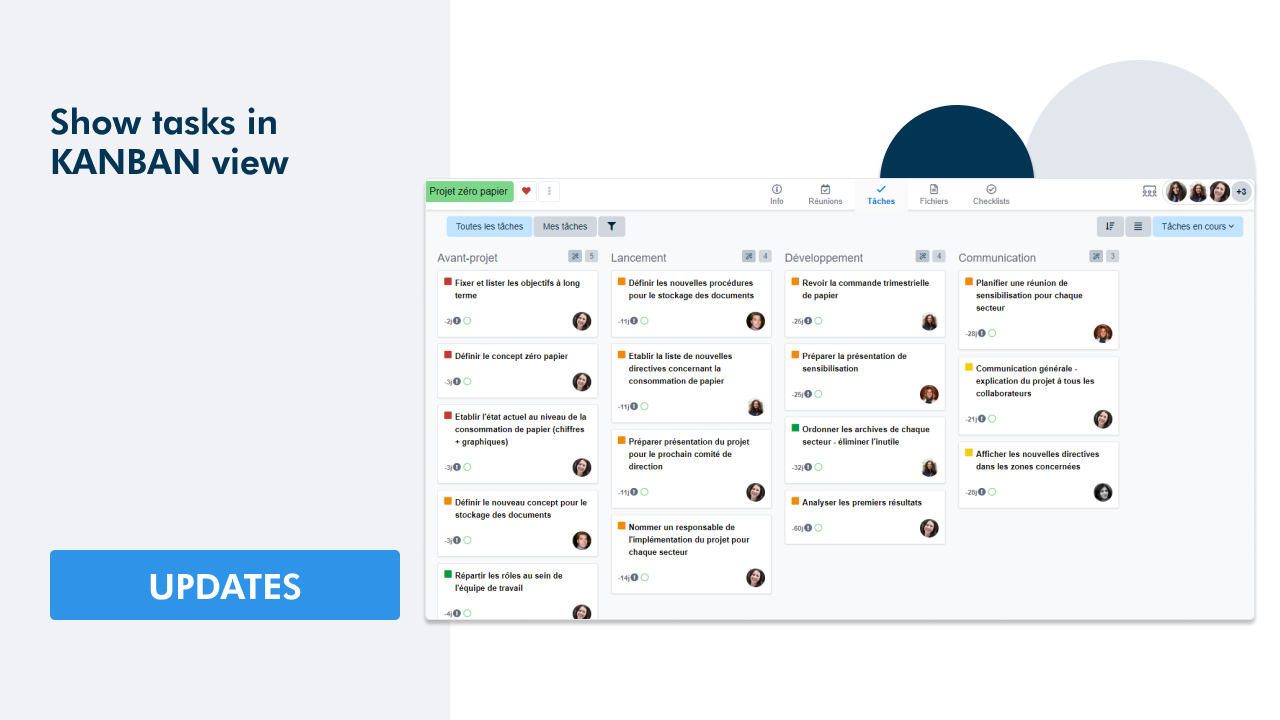
WEDO integrates the kanban view
Sections in WEDO
For a few weeks now, WEDOhas made it possible to choose the sorting of task lists: by date, by due date, by user, by workspace and by priority.
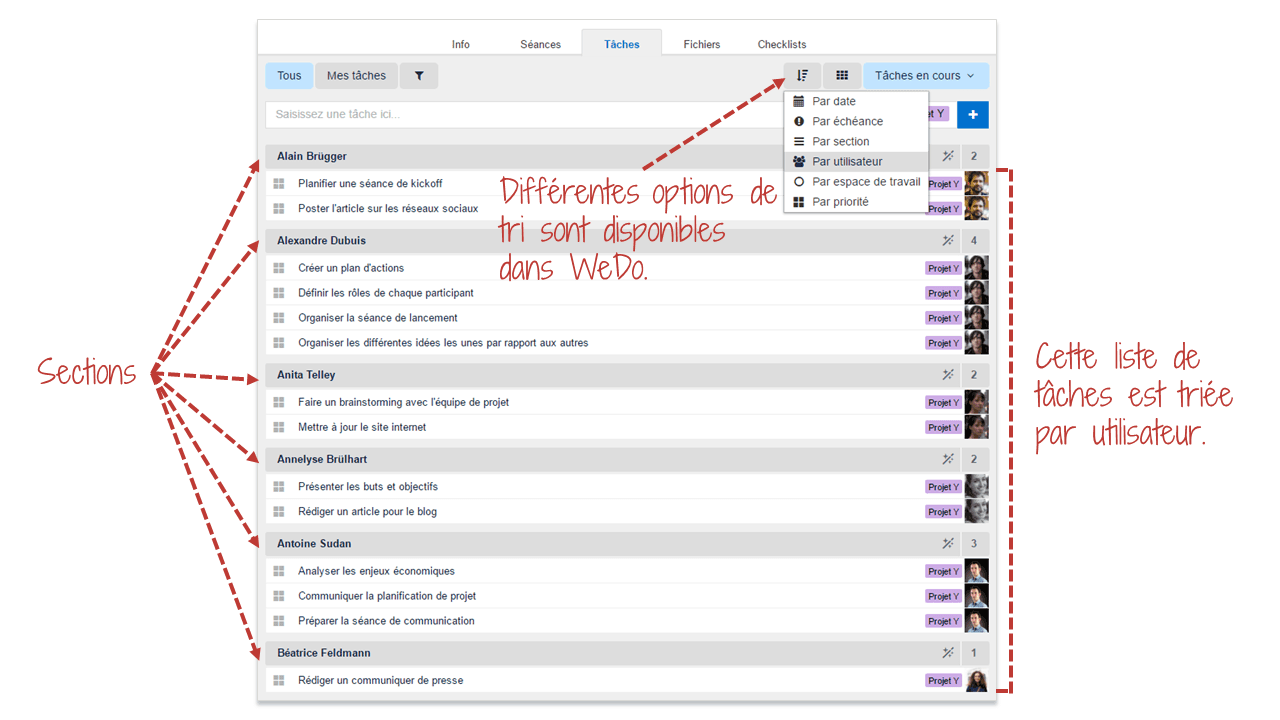
The sections are automatically created according to the chosen sorting mode.
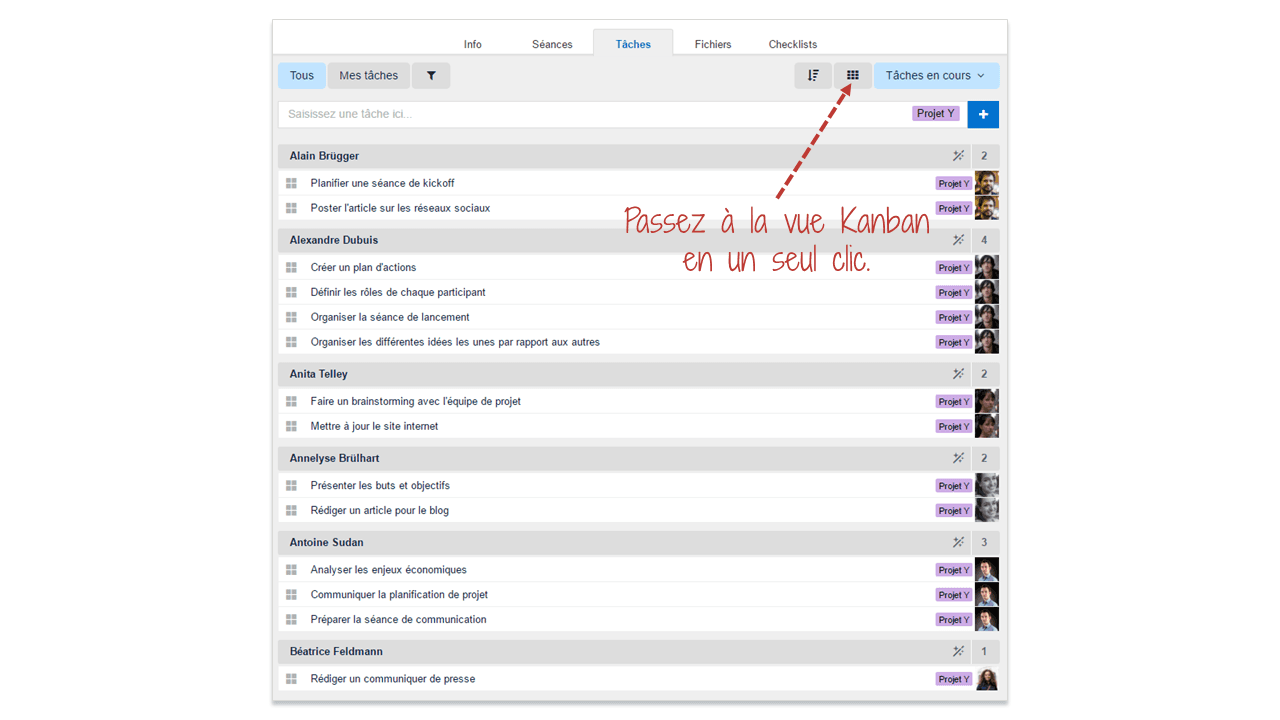
Switch from the list view to the kanban view
In each task list, there is a button to switch from the list view to the kanban view.
Sections are automatically transformed into columns and tasks appear as cards that can be moved from one column to another.
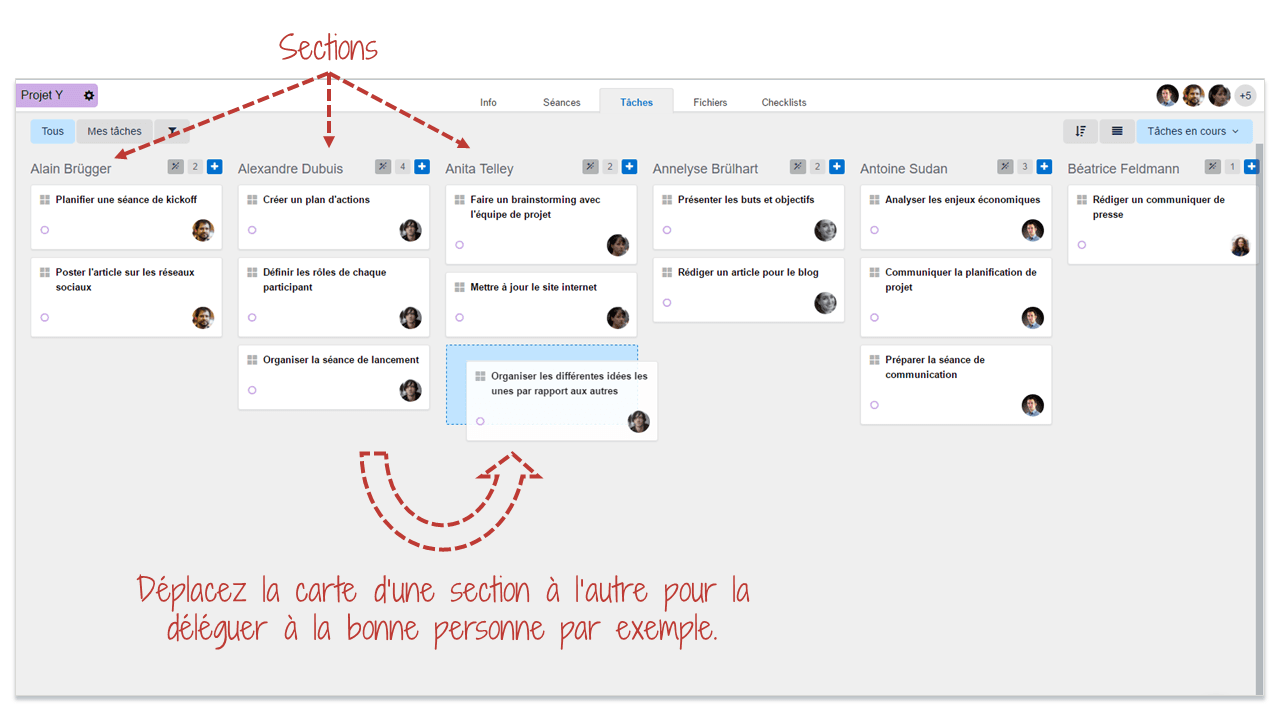
Moving a card from one column to another changes its properties. For example: By sorting the tasks by user with the kanban view display, you can assign the tasks to different people by moving them to the corresponding person column.
Create your own sections
Let's imagine that you want to create a workspace for Project Y that consists of four phases. The four phases are Pre-project, Launch, Development, Communication.
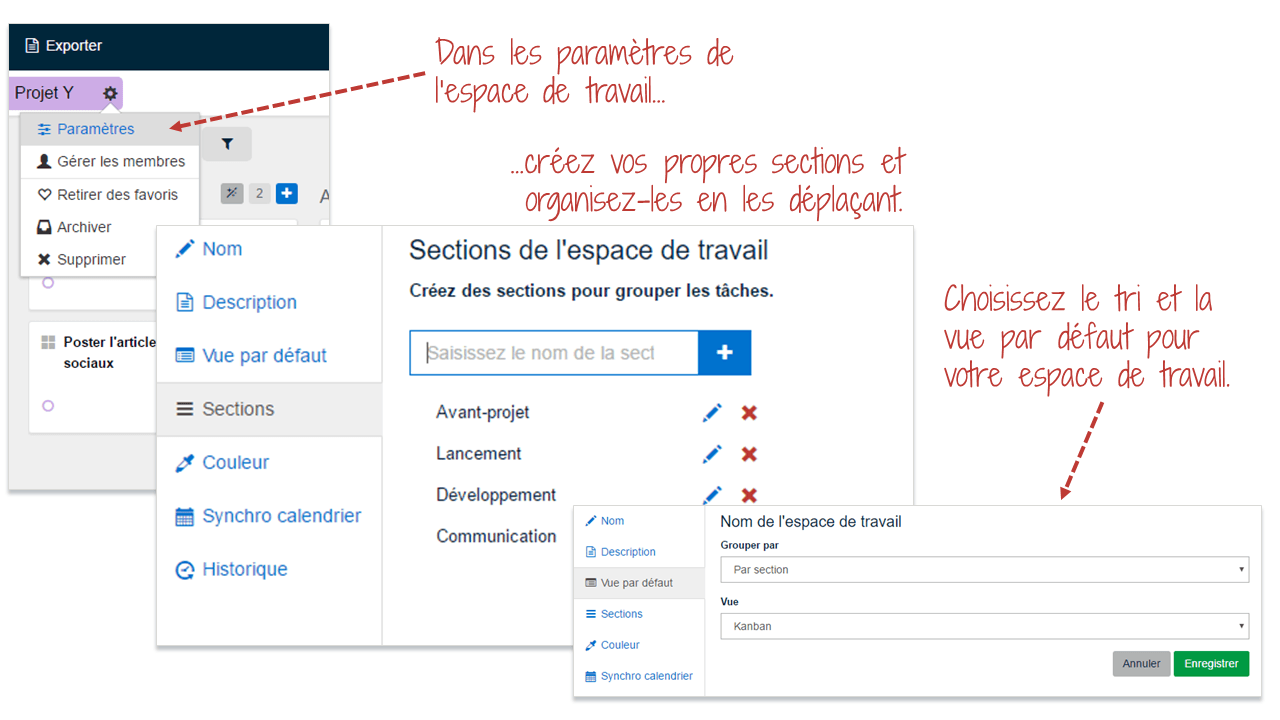
Create the Project Y workspace then go to its Settings > Custom sections tab. Enter the four phases and move them in the desired order. In the Default View tab, you can choose the sort and view that should be selected by default in this workspace.
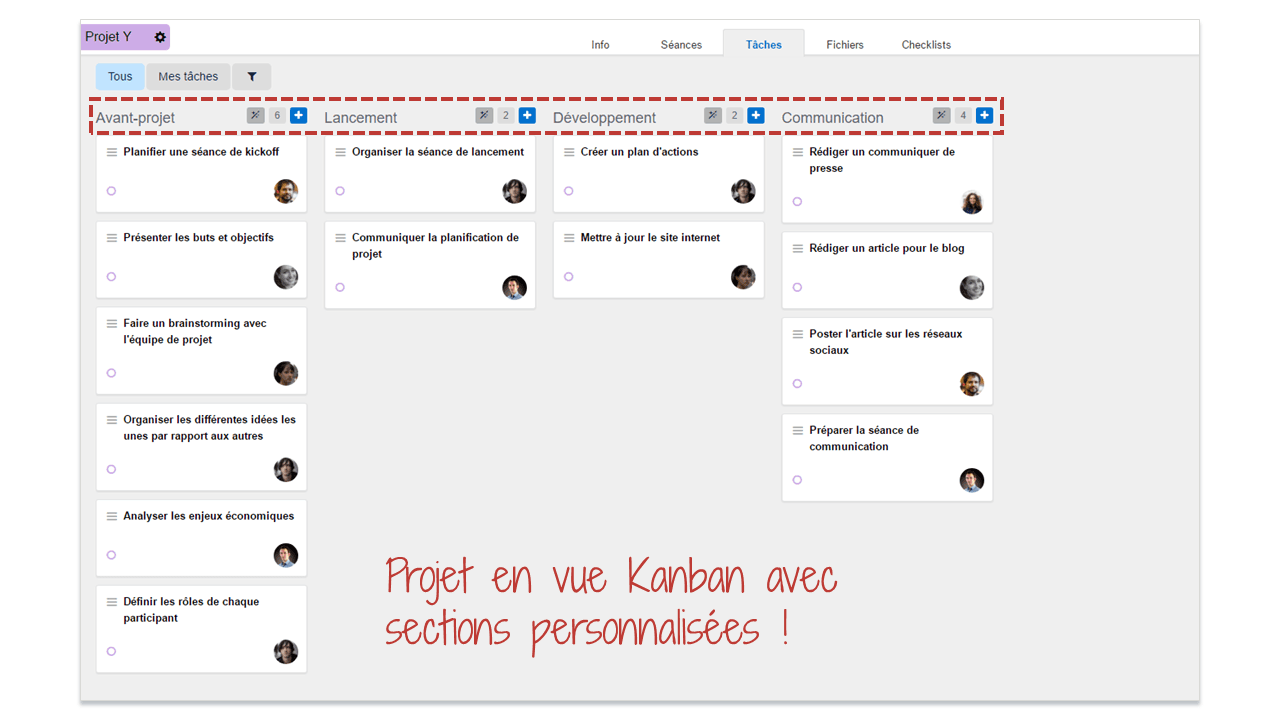
Here's the result:
Note that tasks sorted by section can be organized manually in the desired order.
Conclusion
Thanks to the Kanban view, manage your projects visually. The kanban view makes it easy to monitor the progress of projects and the custom sections allow you unlimited use cases: project milestones, progress statuses, groups by department, and more.
Also to be discovered in this version
Custom sections can also be used in checklist templates.
The sorting of tasks has been improved for greater simplicity and understanding.
The Organize button has been moved to each section to allow a more precise and intuitive use of the functionality.
A new option in the Organize button allows you to set deadlines on the fly for tasks.
It is now possible to create folders in the main menu to group workspaces. Example folders: Departments, Projects, etc. To create folders, go to your Profile > Network Settings > Menu tab. Here you can create folders and drag and drop the different workspaces to organize them. Note that the changes you make are valid for all users on the network.
Finally, the Files tab automatically groups all files related to sessions or tasks in each workspace. First steps in document management in WEDO? Possible...
Related posts

Struggling to Stay Organized?
WEDO is here to help. Start your free trial now and simplify your work processes! You'll get full access to all features and add-ons for 14 days – invite your team to test it with you!

- No credit card required
- No commitment
- Full access to all features
- Support chat access
- Free live demo
