Meeting module : improvements that will facilitate the drafting of your meeting minutes
 Mathilde Sudan |
Table of contents
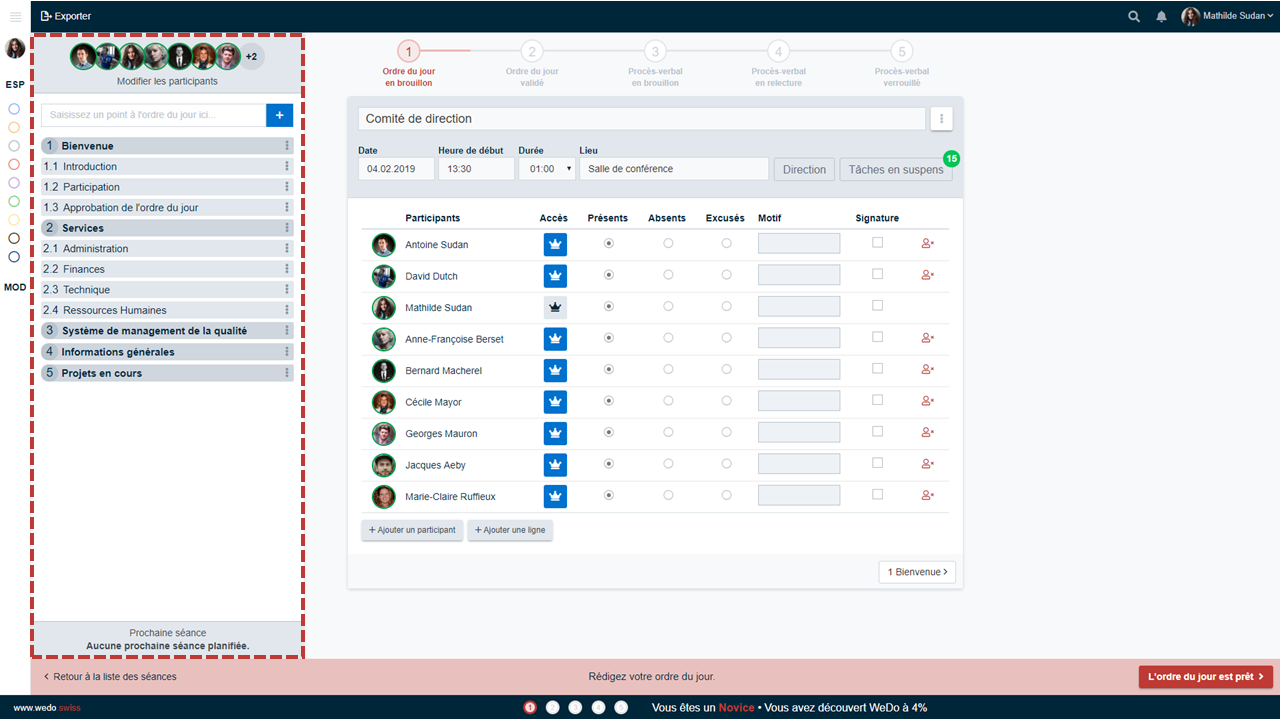
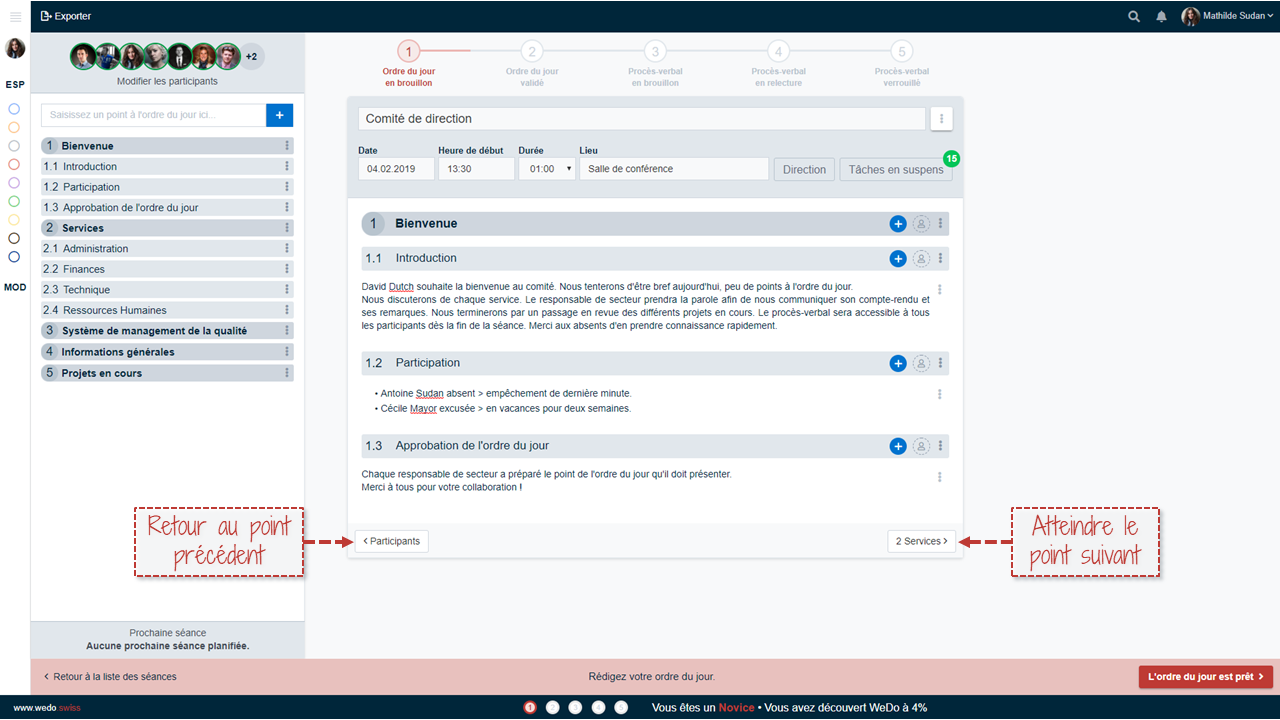
The table of contents facilitates the browsing through the meeting minutes. Furthermore, a single click will bring you to the item to be treated. From the table of contents, you can also:
- Decrease the indentation of an item
- Increase the indentation of an item
- Delete an item
- Drag and drop the items and/or sub-items to organize them
Item by item
For this new version, the drafting has been redesigned: from now on, only the item to be treated will appear on the screen. Once you are done with an item, you just need to click the button with the title of the next item to be treated to progress in the drafting.
Redesigned Toolbar
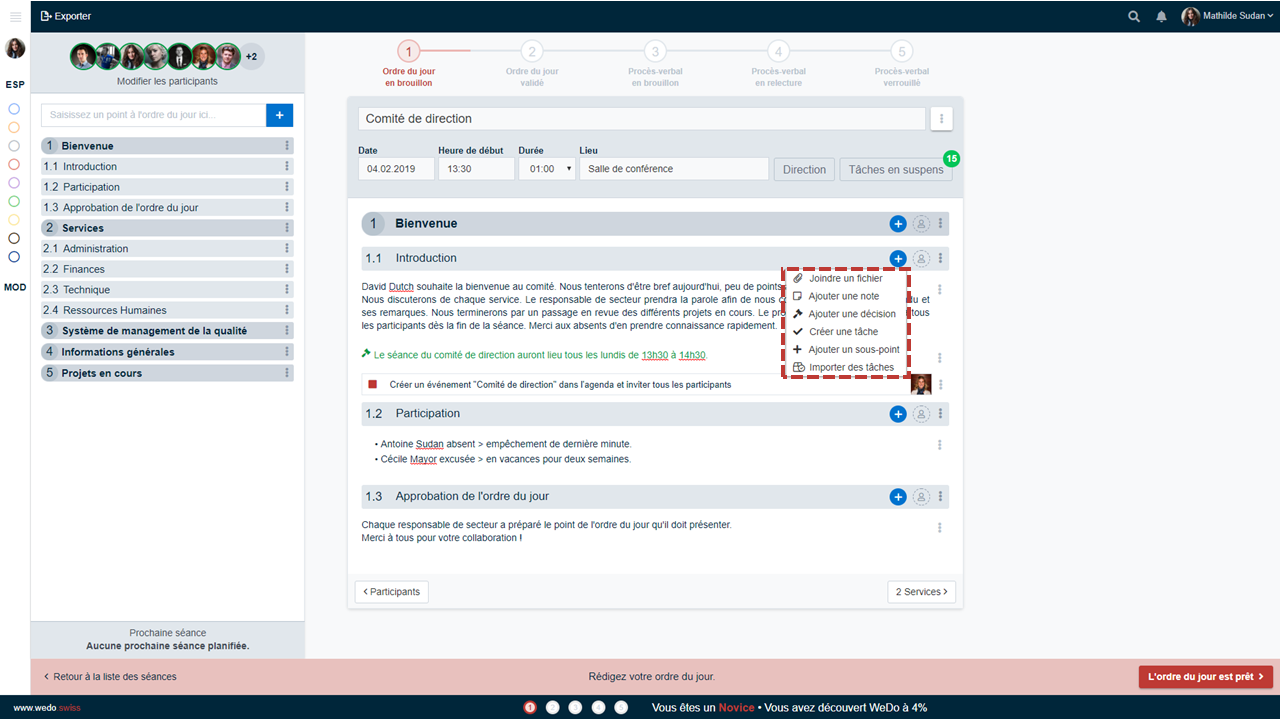
Each item and sub-item has its own Toolbar. From the + button you can:
- Attach a file
- Add a note
- Add a decision
- Create a task
- Add a sub-item to the meeting agenda
- Import tasks from the workspace
The “move” button
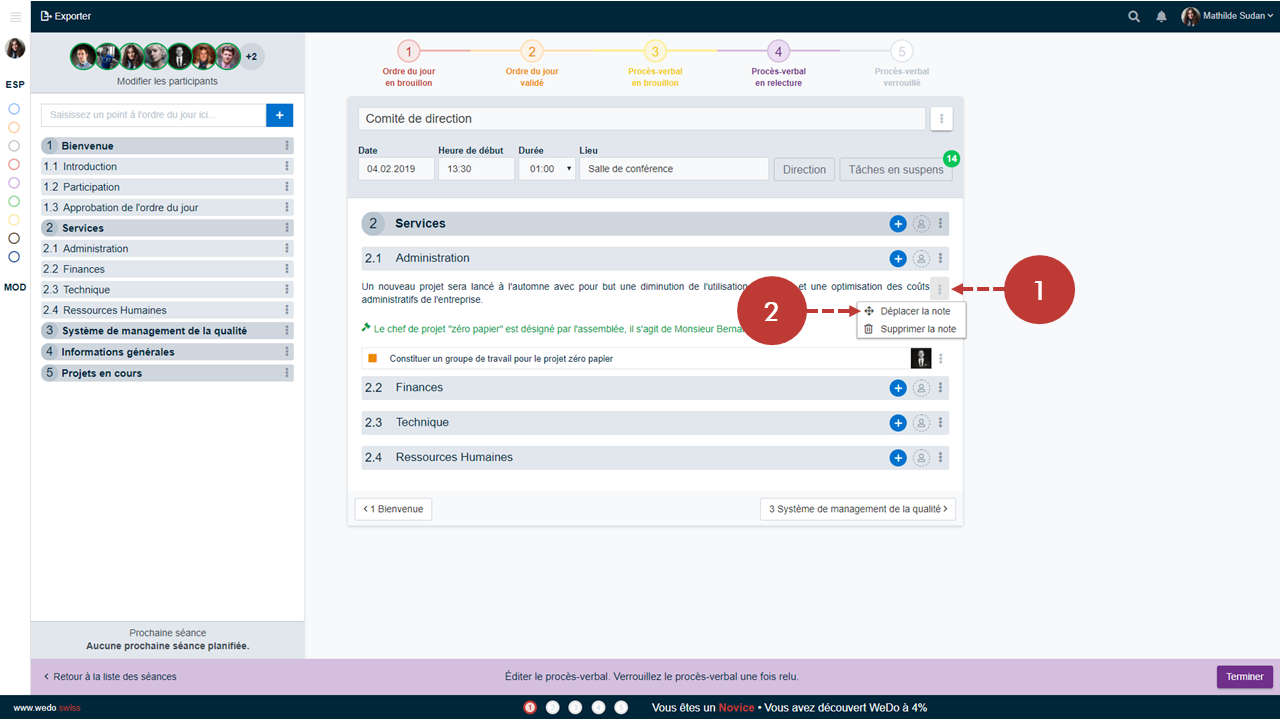
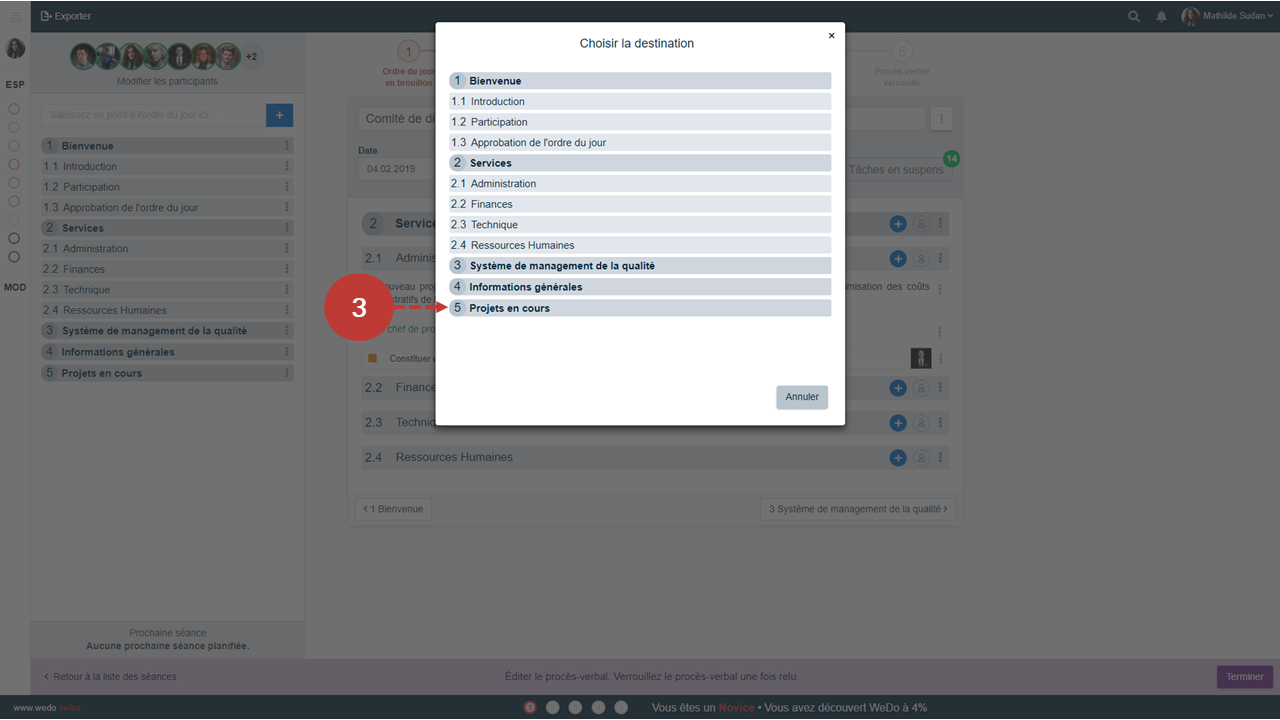
It is now possible to move a note, a decision, a task or a file to another item in the meeting agenda. Click the button with the three vertical points (1) and Move the note (2). A window will open with all the possible destinations. Click the item to which you wish to move your note (3). The same procedure applies to move a decision, a task or a file.
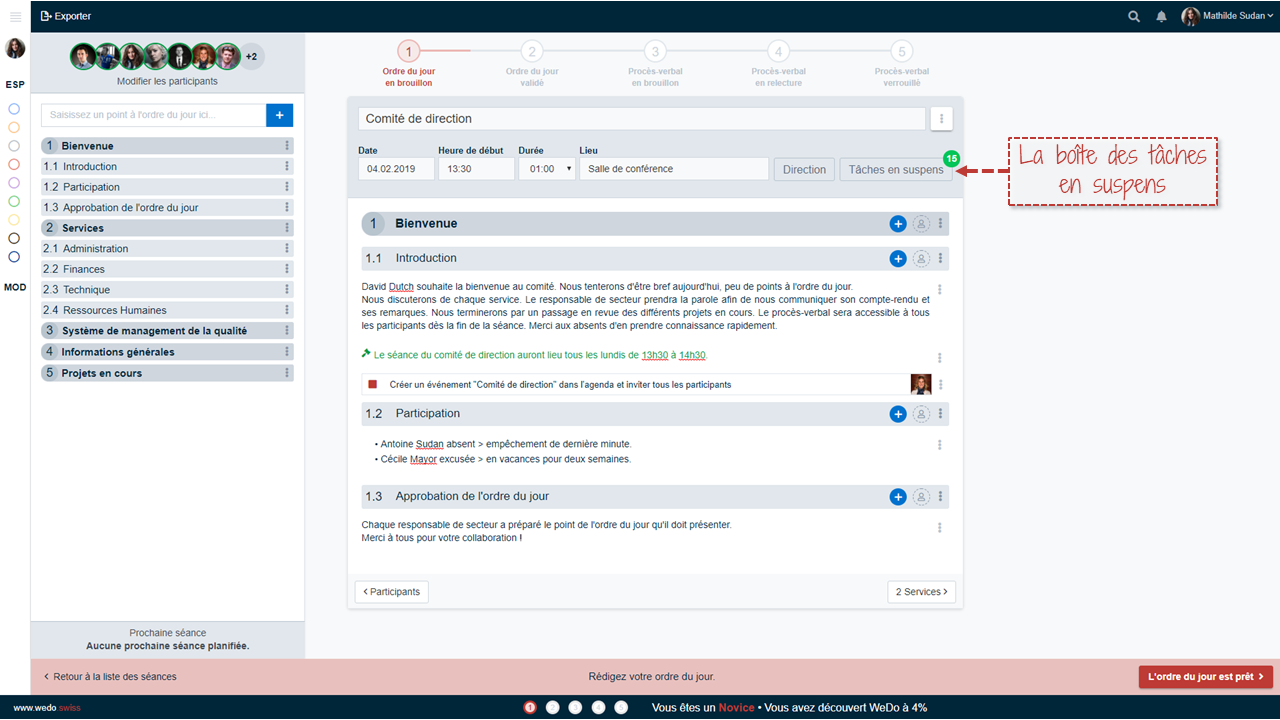
The pending tasks box
Pending tasks from the workspace are now available in a box that you can access with a button.
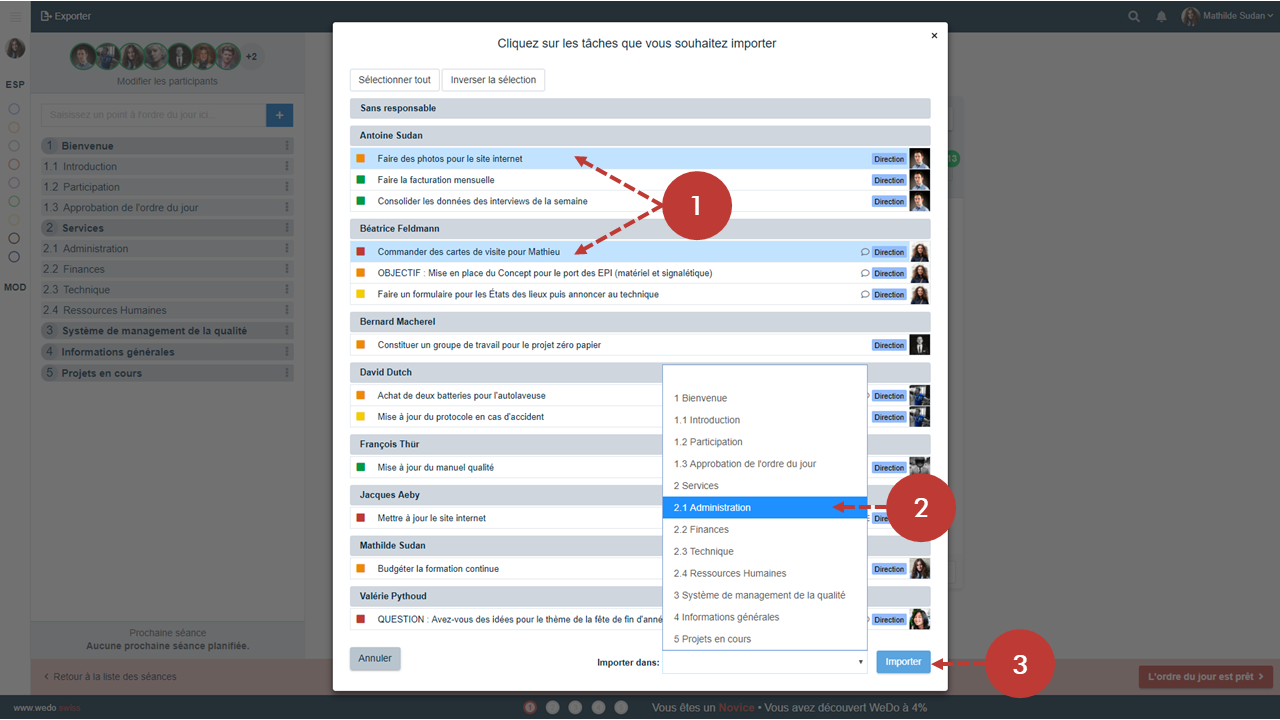
From the pending tasks box, it is possible to import tasks into a specific item: click the tasks to import (1) and, with the drop-down list, select the item in which you want to import the tasks (2). Then, click Import (3).
Info : if you would like your pending tasks to figure as an item in your meeting agenda, like in the previous version, you can simply create an item entitled “Pending tasks” and import all the pending tasks from the workspace.
The 5 steps of the meeting
At all times, you can see which step of the meeting you are in. The user with all access rights can click on each step to change the status of the meeting.
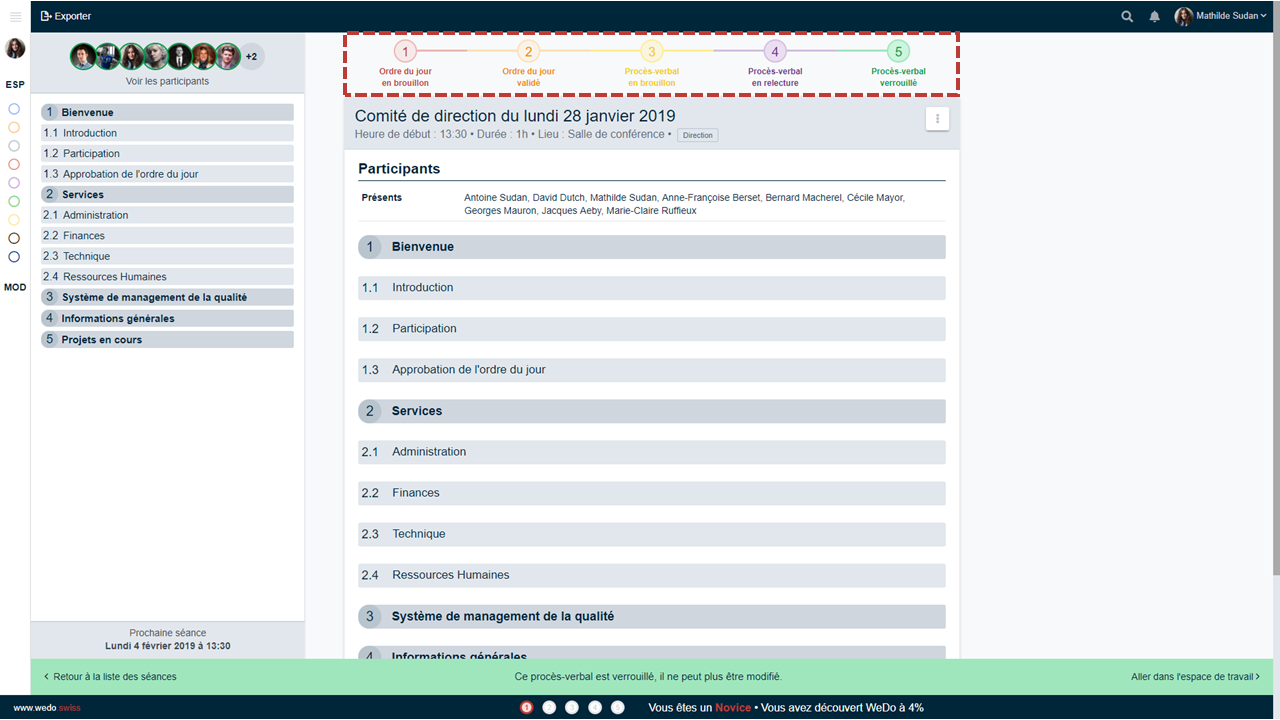
Info : other buttons at the bottom of the page also allow you to switch from step to step.
Display of access rights of each attendee
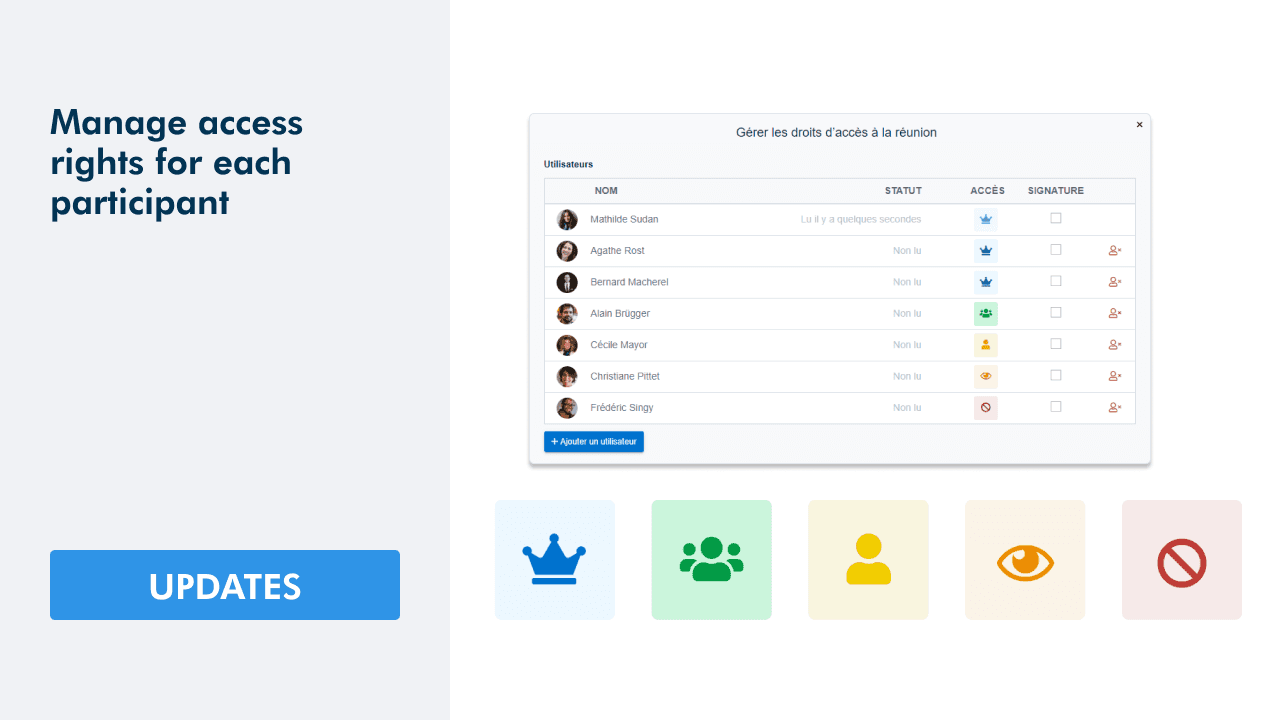
You can now click on the attendees of a meeting to see the distribution of access rights. Click on the attendees (1), a window will open with a list of the meeting attendees and their access rights for the current meeting (2).
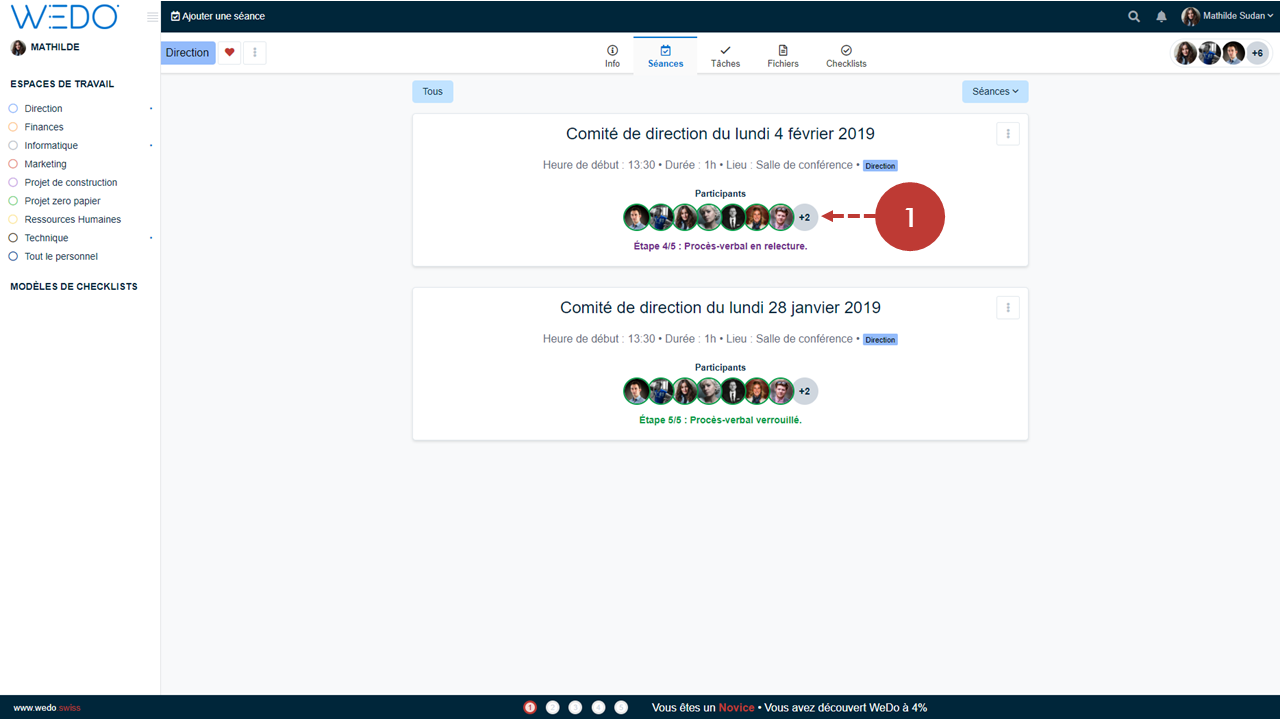
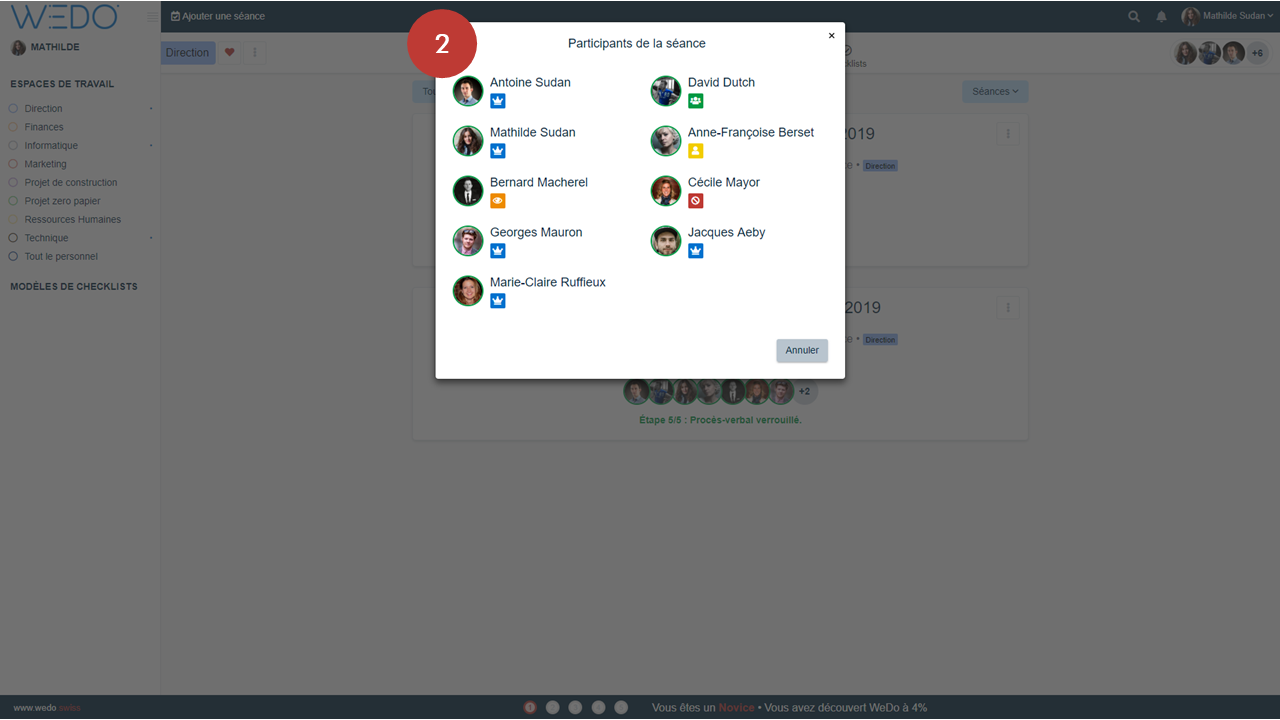
This can be useful if you need to modify meeting minutes but you do not have the appropriate access rights. You can then spot the attendees who have full access rights on that meeting, who will be able to change your access rights. Attendees with full access rights are represented by a logo with a crown on a blue background.
-
A collection of articles explains all the ins and outs of the new Meetings module.
